Arachne web browser. Installing and setting up for dial-up internet connection
Option 1 - Installing on a disk created in RAM
Installing Arachne web browser on a disk created in RAM - Arachne runs the fastest this way. RAM size should allow for a RAM disk of 6 MB or more.
In order to install and set up Arachne web browser for dial-up internet connection, there have to be several programs at hand:
- Arachne web browser [ Download ]
- If Arachne web browser is to be used for surfing web pages with character encoding other than Latin for West European languages, visit www.glennmcc.org/apm/ to find available character set packages and download the necessary one.
- Mouse driver, mouse.com for instance [ Download ]
- Archivers. For example, PKZIP [ Download ] and PKUNZIP [ Download ]
- If it is not MS-DOS 6.0+ to be used, QEMM97 [ Download ]
- If it is not MS-DOS 6.0+ to be used, TDSK [ Download ]
Setup and installation
1. Create a RAM disk. Which drive letter will be assigned to it comes from the assumption that A: and B: go to floppy drives (even if there is only one, both letters will be reserved anyway), C: goes to the first active primary MS-DOS partition on the first physical hard disk. If there are more disks, then there will be as many letters used consecutively as to name them all. Unless there are no devices installed using DRIVER.SYS or similar drivers, the next drive letter will be assigned to the RAM disk. In order to be sure, after having the relevant string for making RAM disk added to CONFIG.SYS (See below), computer could be restarted and what letter is assigned to the RAM disk checked by experiment. In this case, it is E:
Depending on RAM size it needs to be decided how many megabytes can be reserved for RAM disk. Basically, the more the better. Since, for instance, web browser cache is going to swell during prolonged and intensive use within a session. In this example the RAM disk is 12 000 KB. The maximum size for RAMDRIVE.SYS MS-DOS driver is 32 767 KB, the one of TDSK - 64 MB.
In order to create such a disk, the string has to be added somewhere in the middle of CONFIG.SYS as follows:
DEVICE=C:\DOS\RAMDRIVE.SYS 12000 512 512 /E
2. Create a folder, for example C:\DRIVERS\. Put there a mouse driver, for instance mouse.com
3. Add a string starting mouse driver to AUTOEXEC.BAT. Specify there the full path to the driver, may be any:
LH C:\DRIVERS\MOUSE.COM
4. Run MemMaker or OPTIMIZE from QEMM97 to optimize base memory management. If it is MemMaker, press Enter at any suggestion - MemMaker will handle it itself. Computer is going to restart several times, each time MemMaker will be re-running - again nothing, just Enter, is a safe choice. If it is QEMM97 (specifically OPTIMIZE), then there is going to be several restarts too and each time just pressing Enter is OK.
5. Start installation of Arachne web browser on RAM disk. In the case discussed it is E:
A195GPL.EXE
Press Y to continue
Press N to specify the path to the folder Arachne web browser is to be installed in
Specify the path to the folder Arachne web browser is to be installed in. In the case discussed it is E:\ARACHNE\. Enter
Copying files to the folder
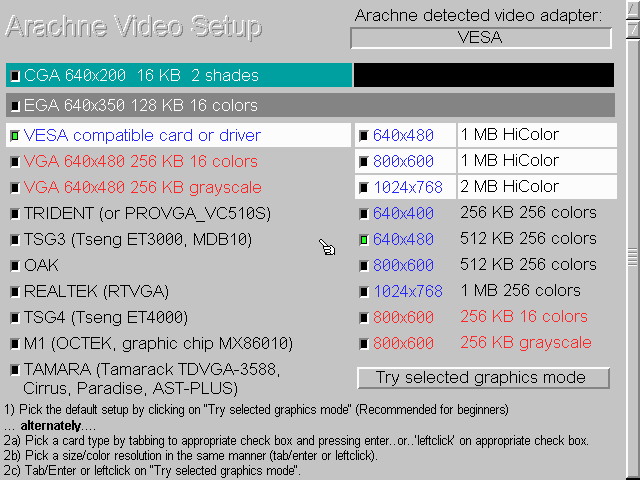
The beginning of Arachne web browser setting up. Select settings corresponding to the characteristics of the computer Arachne web browser in being installed on. Arachne setup wizard usually adequately determines video adapter type, so, at least during the first installation experience the selection may be confined to choosing desirable screen resolution and color depth. In the case discussed the maximum "1024x768 2 MB HiColor" is selected. Then click "Try selected graphics mode". If something is wrong, Arachne setup wizard will either have the process returned back to video settings selection or at worst the installation will be cancelled and can be run again. If video adapter can work with the settings selected, then the next dialogue will follow
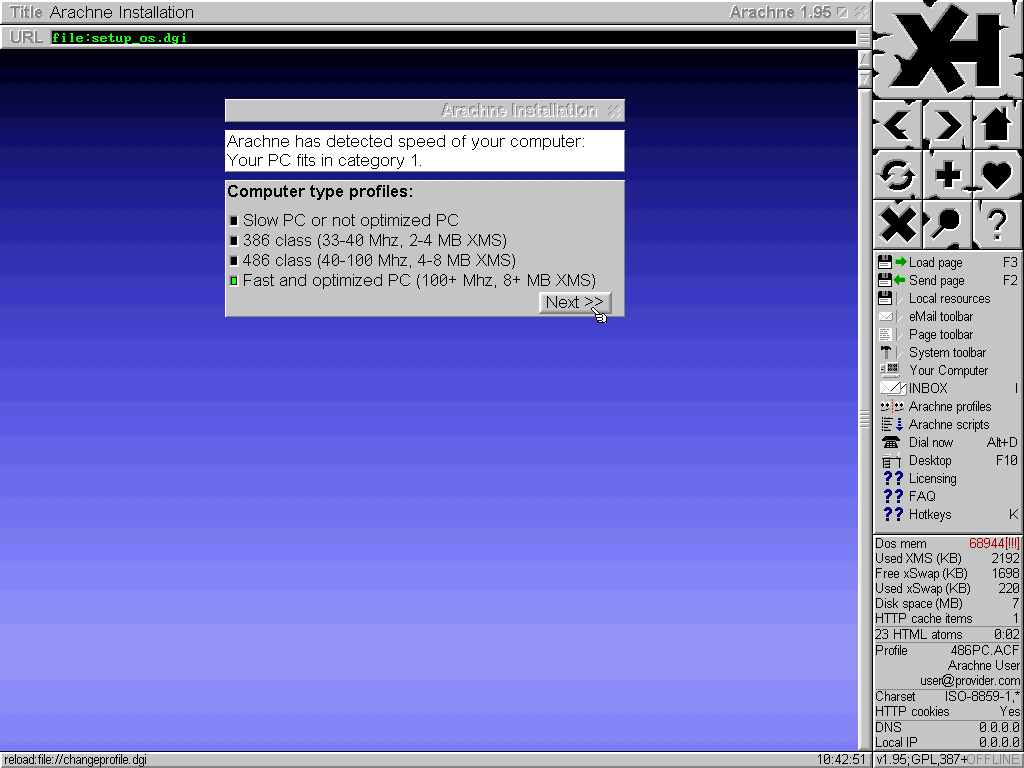
Select category corresponding to the type of computer used. Arachne setup wizard ordinarily adequately determines this category with respect to the web browser requirements, so the setup wizard's choice may be left as it is. Even if it is not obligatory. Arachne setup wizard selects the maximum level corresponding to the computer, therefore any other, corresponding to a simpler type of computer, category may be chosen. Click Next
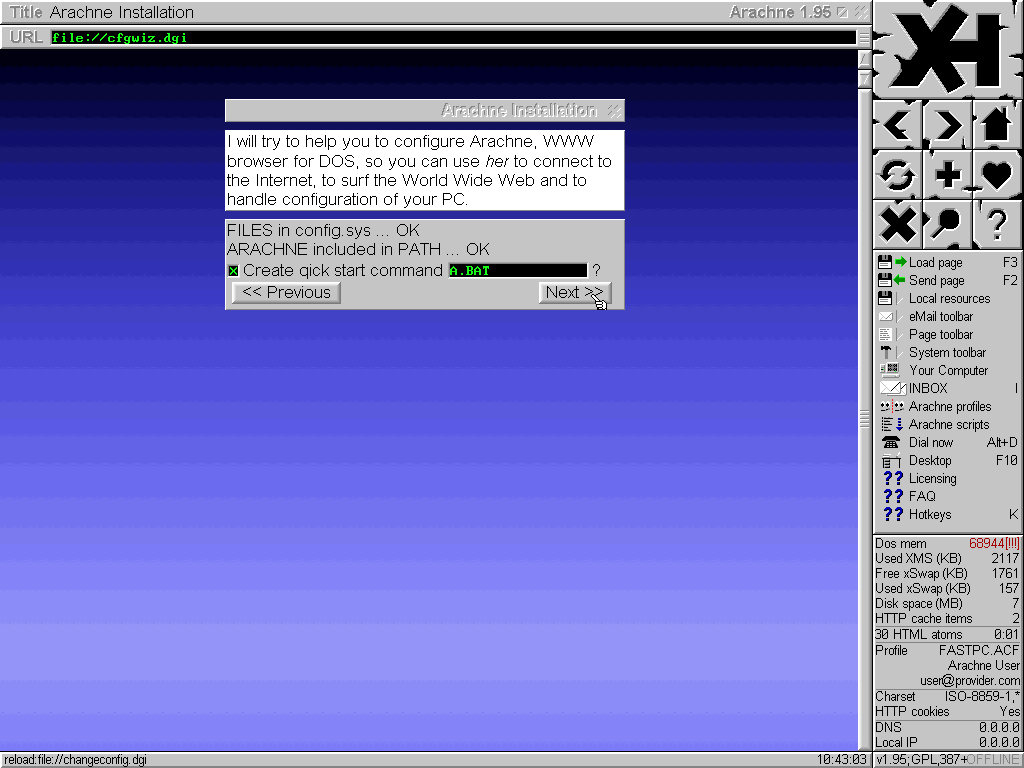
Choose to create or not to create a quick start batch file for Arachne web browser and under what name. In the case discussed the setup wizard's suggestion is accepted: create quick start file for Arachne web browser under the name of A.BAT. Click Next
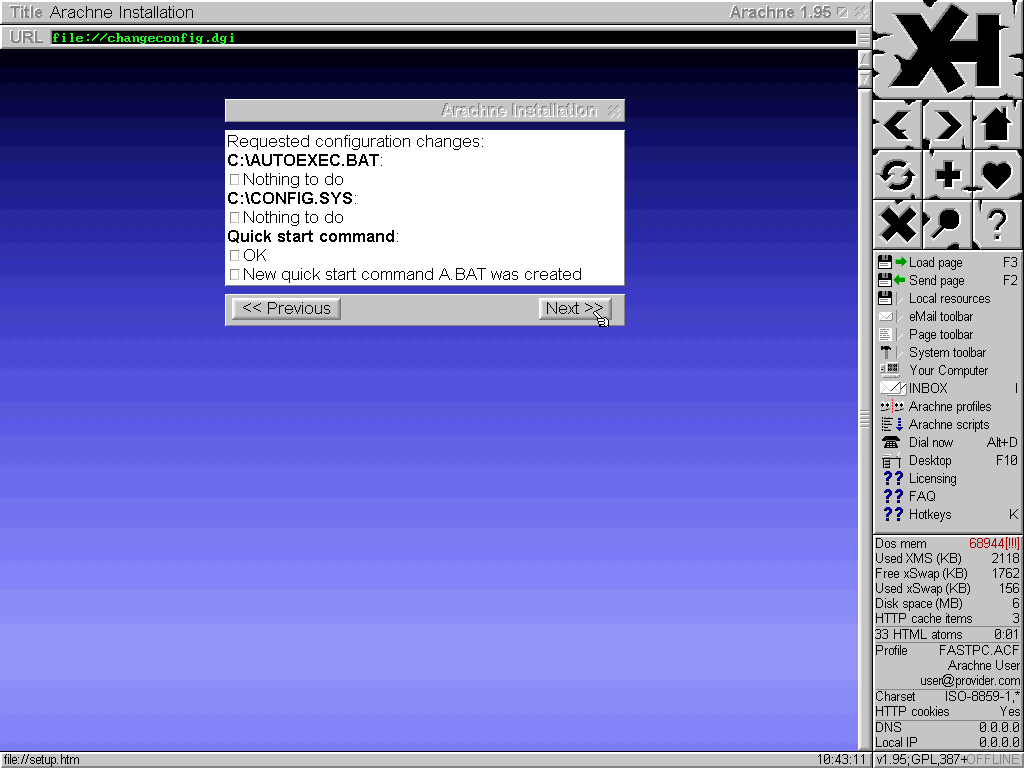
Summary of changes made and confirmation. Click Next
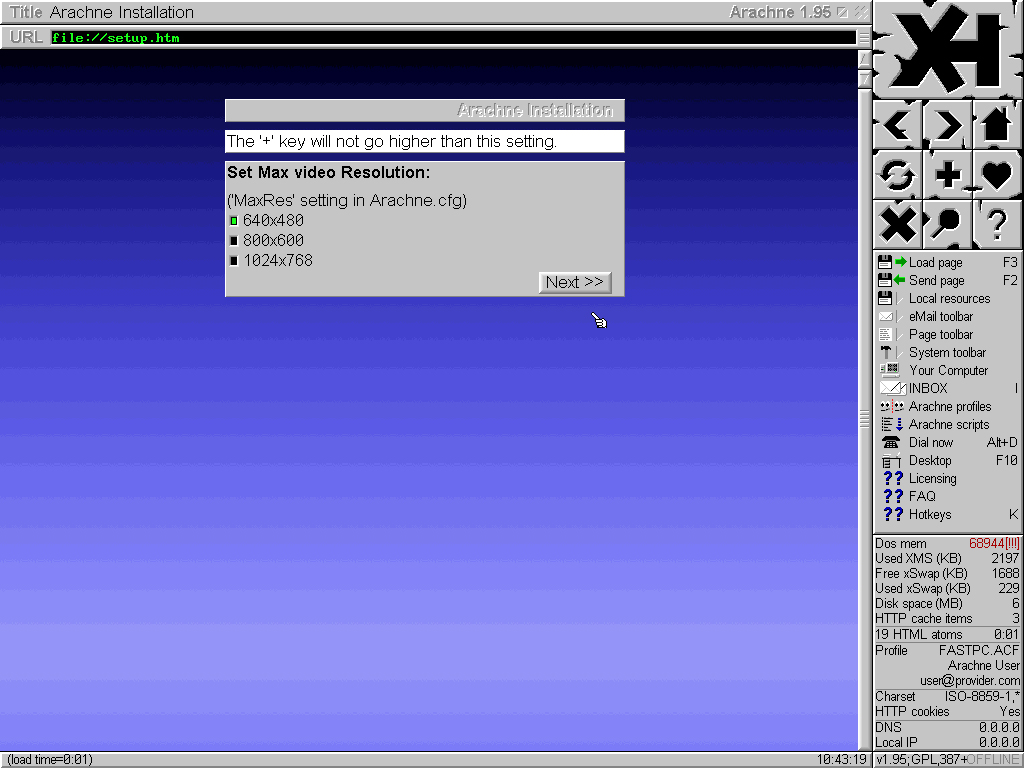
Select the maximum screen resolution Arachne web browser is going to run at. In the case discussed 1024x768 is selected. Click Next
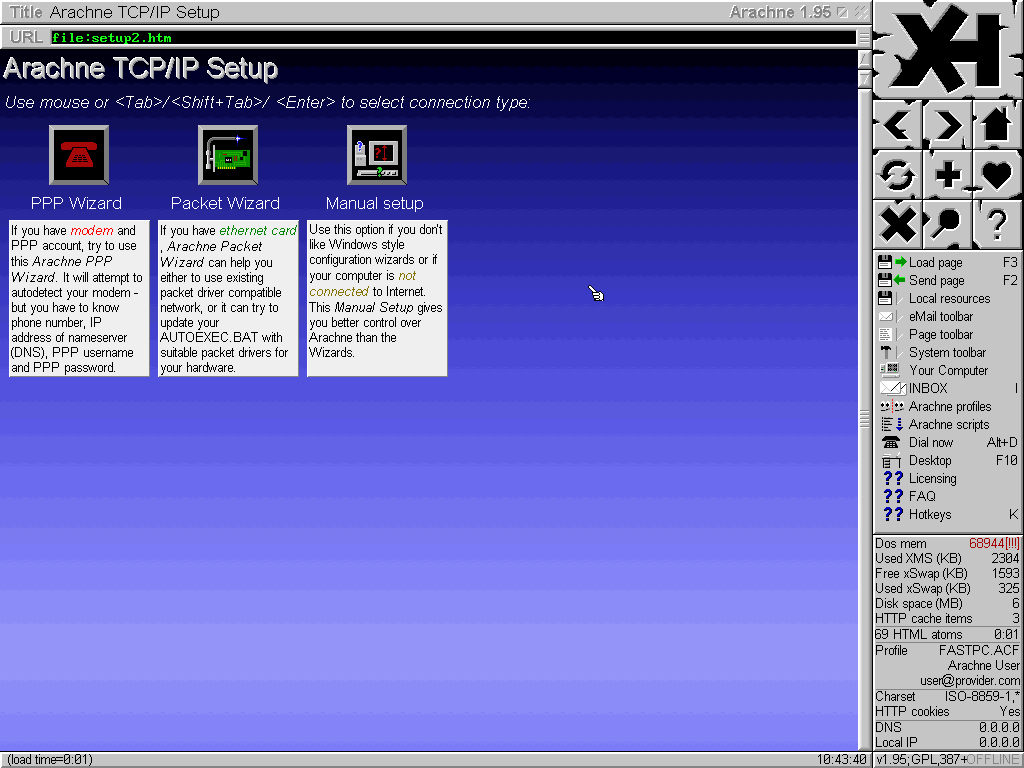
Starting to set up Arachne web browser for dial-up internet connection. Select "PPP Wizard", click the icon over the caption
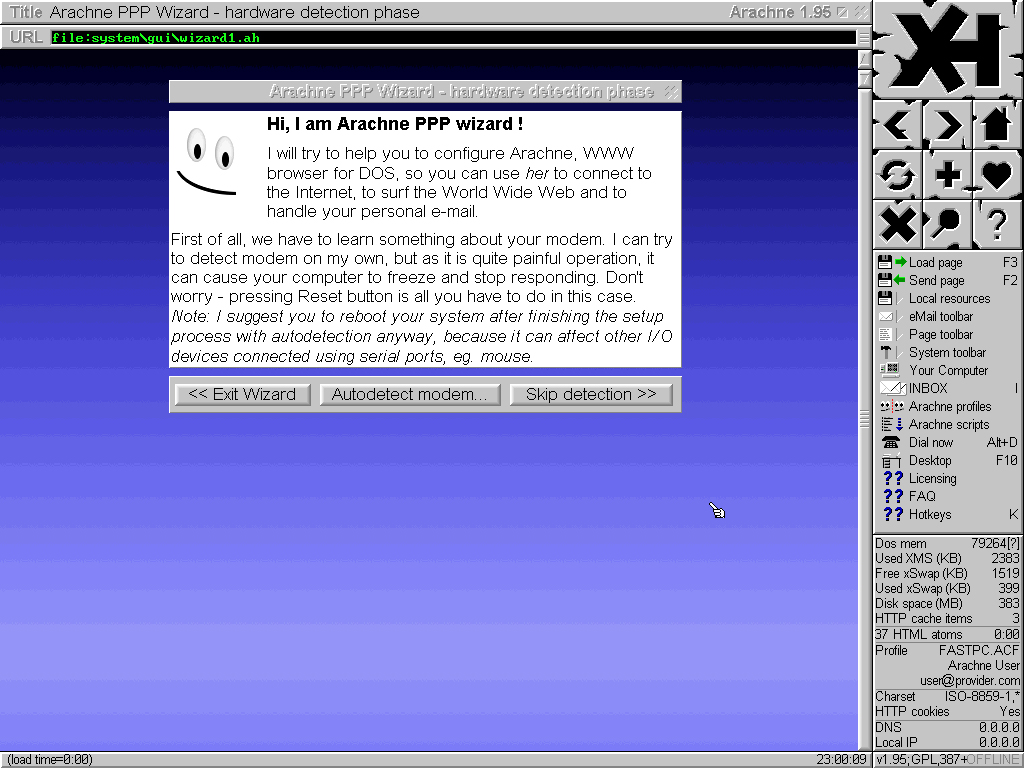
In order to make Arachne setup wizard detect modem, click "Autodetect modem..."
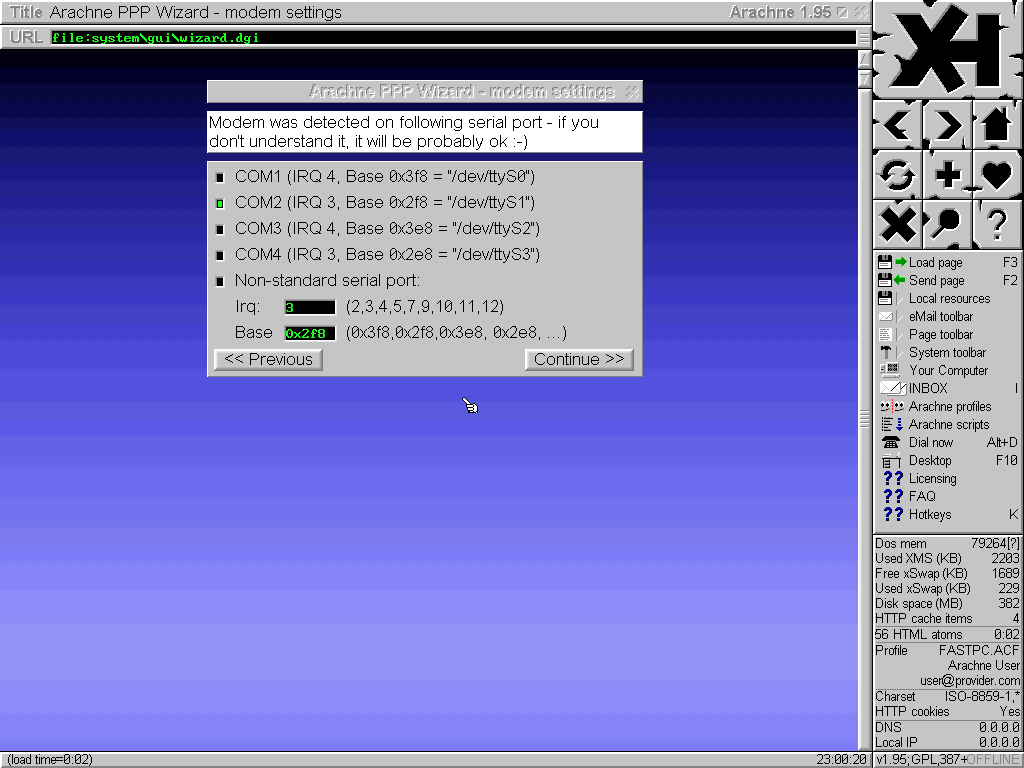
Ordinarily Arachne setup wizard detects the modem. Then click "Continue". If it does not, then the modem may be added by hand: /dev/ttyS0 for COM1, /dev/ttyS1 for COM2 and so on. If this fails too, then it is most likely a hardware problem (idle or broken modem, port, other malfunction). It has to be identified and fixed before re-trying to install and configure Arachne web browser for dial-up internet connection
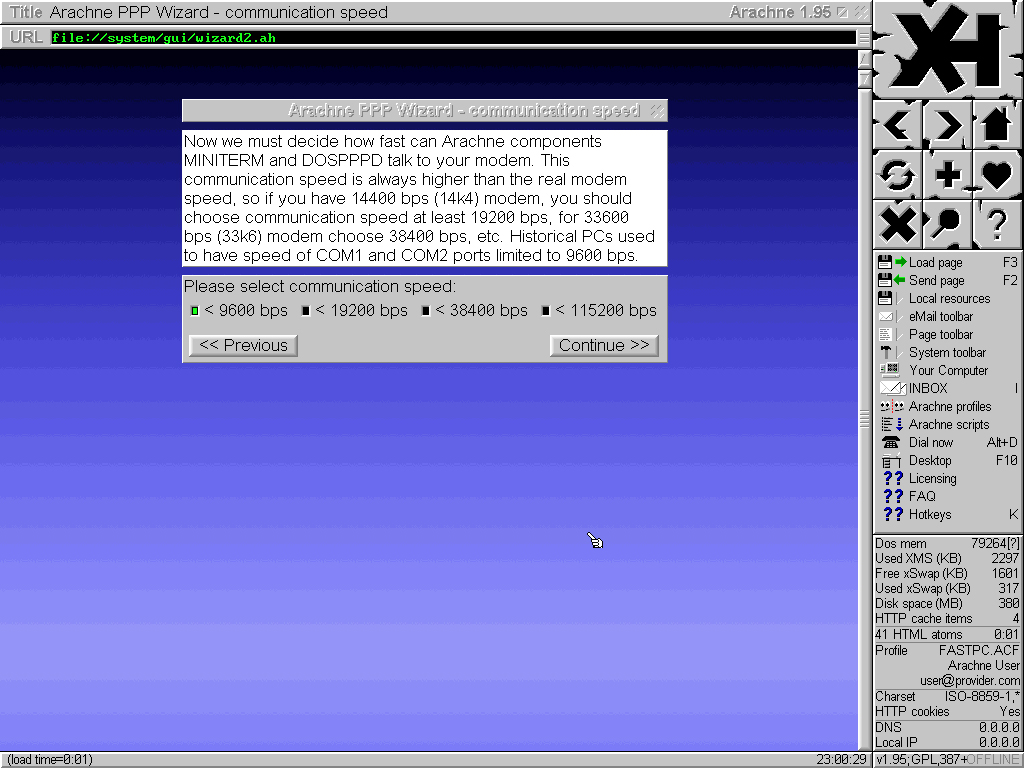
Select communication speed. For 14.4 modem, choose 19200 bps, 33.6 - 38400 bps, for 56k and higher - 115200 bps
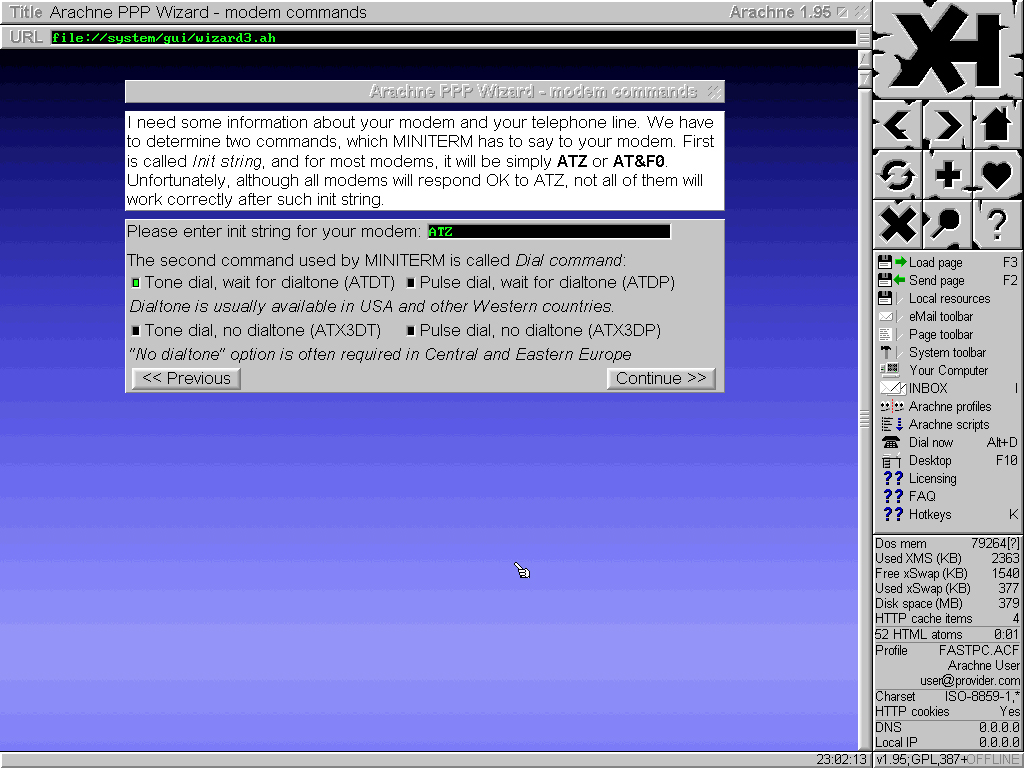
Select tone or pulse dialing. If there is no information about technical characteristics of the telephone exchange, then start testing with pulse dialing - if the telephone exchange supports tone dialing it usually supports pulse dialing as well. I.e., when telephone exchange functions with pulse dialing support or there is no information about it, select ATDP then. If dialing is pulse, but no connection can be established, then the configuration process has to be repeated and ATX3DP selected at this dialogue. If this fails too, then an option with placing "p" right before the ISP phone number must be tested, for example: p1231212. Basically, it is better to find out what dialing is supported by the telephone exchange, by trying to connect, for instance, employing ATDT or ATX3DT as well - higher internet connection speed can be achieved by using tone dialing. In the end, click "Continue"
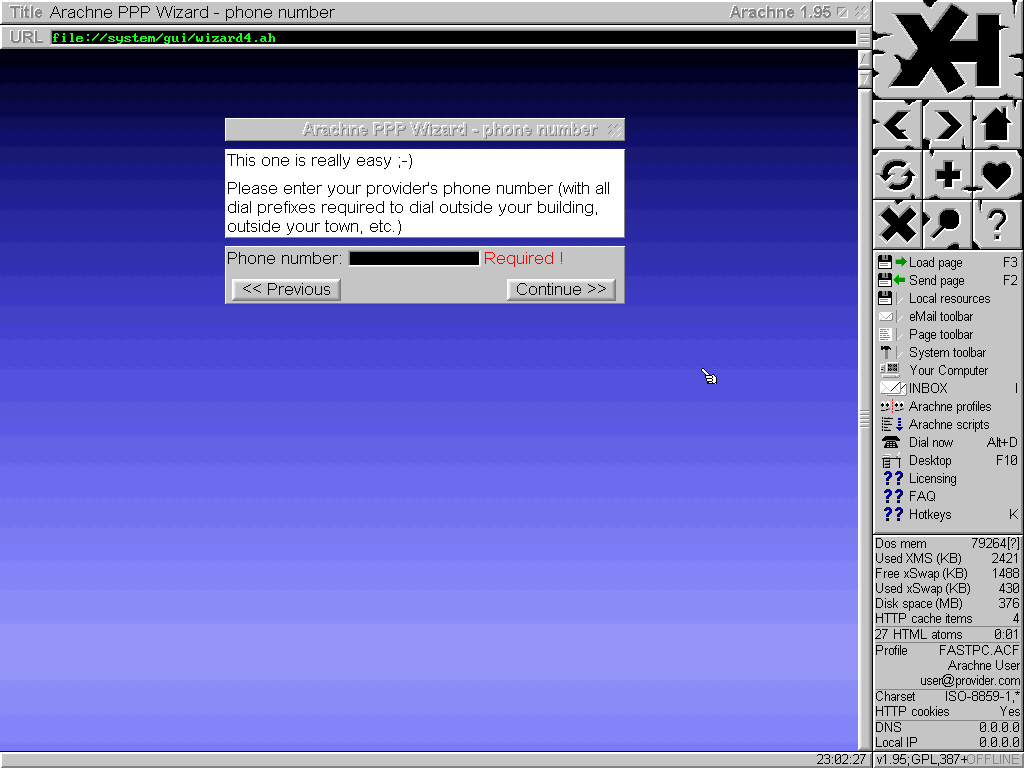
Enter the phone number of internet service provider. "Continue"
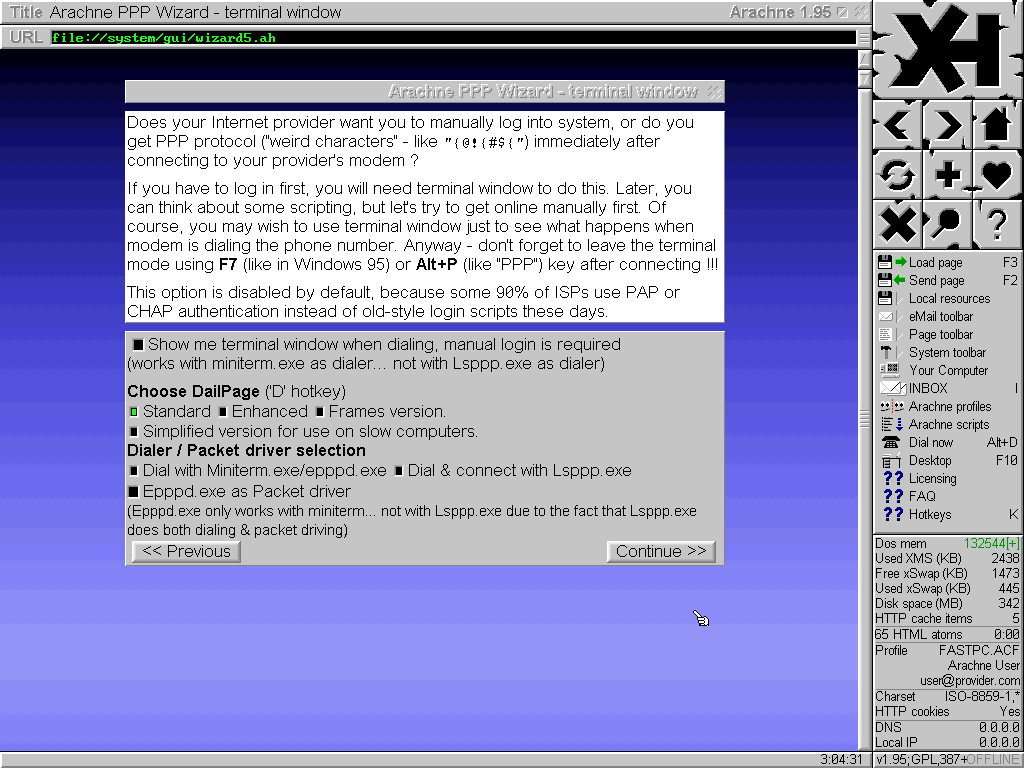
If manual logging in is required by the ISP, select "Show me terminal window when dialing, manual login is required", "Dial with Miniterm.exe/epppd.exe" and "Epppd.exe as Packet driver". Nowadays it is quite unlikely for an ISP to use this method, so when authentication process does not require manual handling, select only "Dial with Miniterm.exe/epppd.exe" and "Epppd.exe as Packet driver". If this combination fails - technical characteristics of ISP services vary - the other one must be tried. Then "Continue"
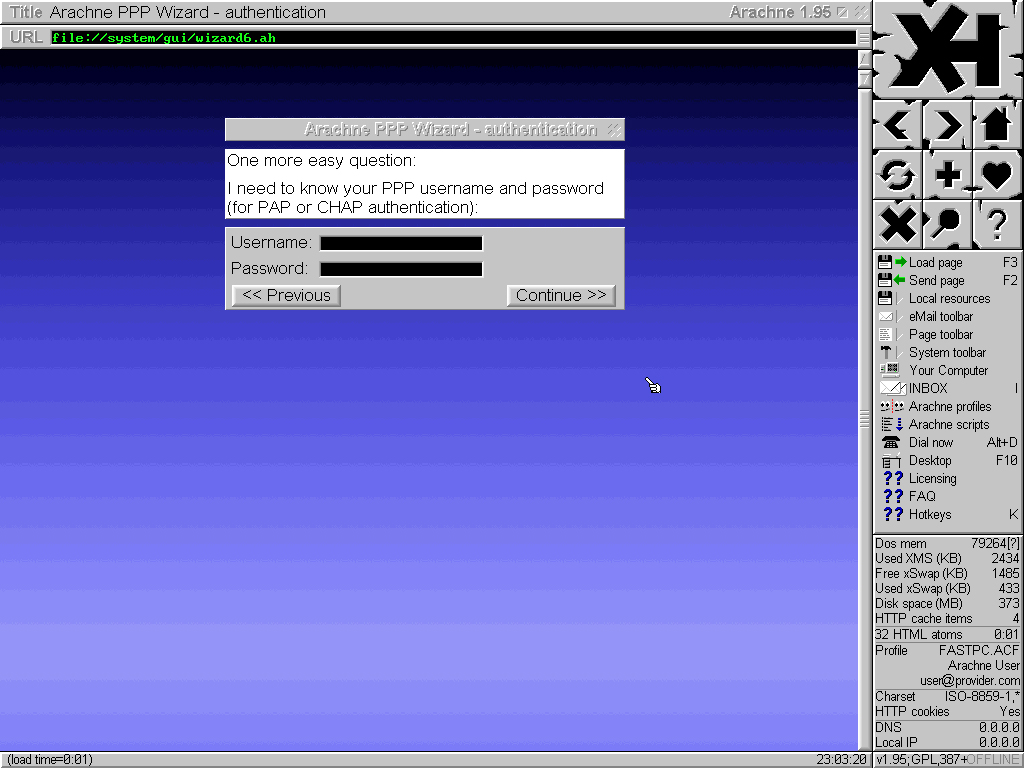
Enter username and password. "Continue"
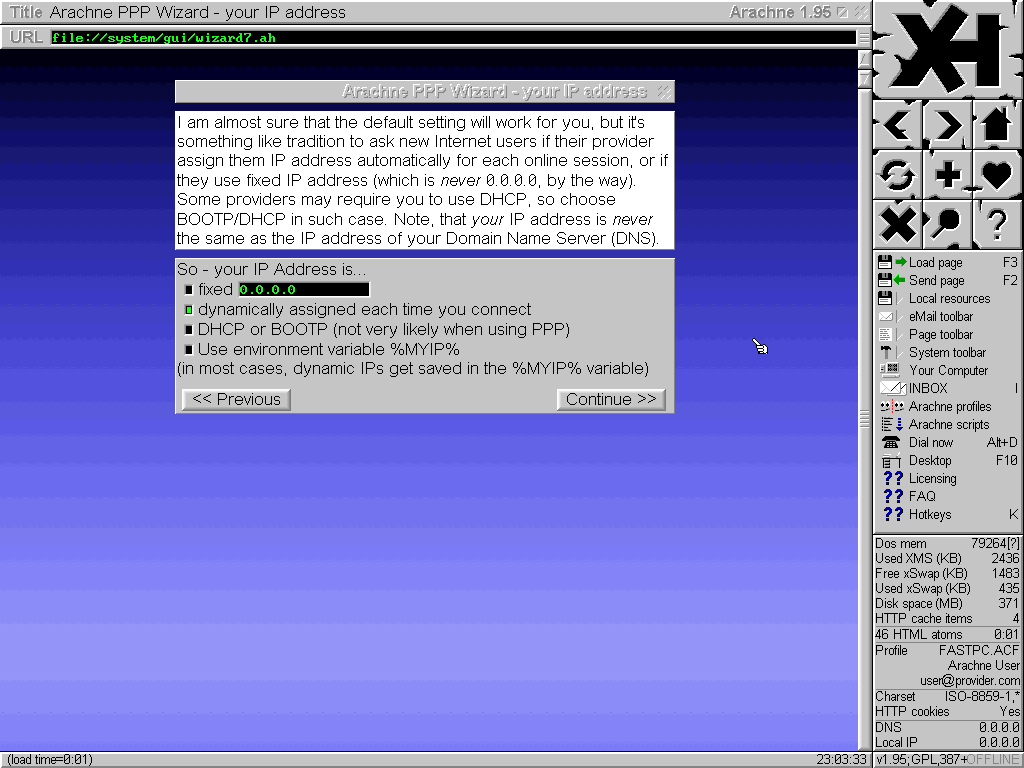
If there is a static IP address, enter it and click "Continue". If there is not, just click "Continue"
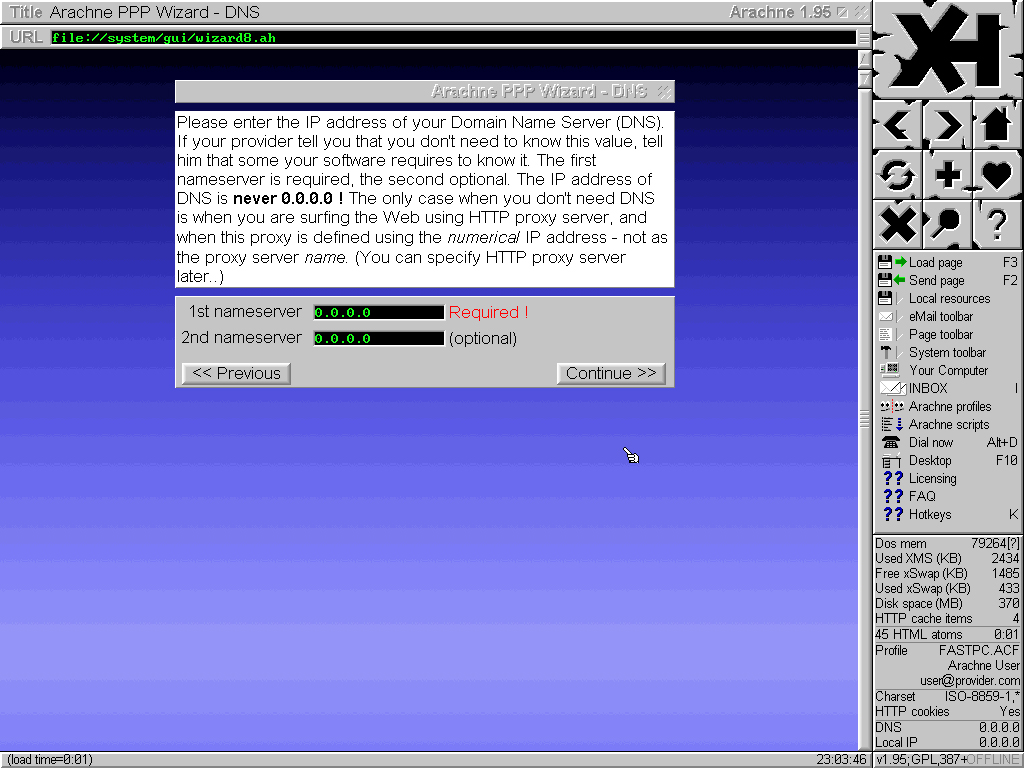
Enter DNS server address. To find it out, contact the ISP for the information. Or, having internet connection established using service of the ISP on a PC with Windows, type in ipconfig /all then press Enter in Command Prompt (cmd.exe). There will be a table with data, including "DNS Servers". Enter one of its values, the first one for instance, in the respective dialogue box of Arachne setup wizard. Similarly, if there is a computer with Linux instead of Windows: cat /etc/resolv.conf - one of the values of "nameserver". "Continue"
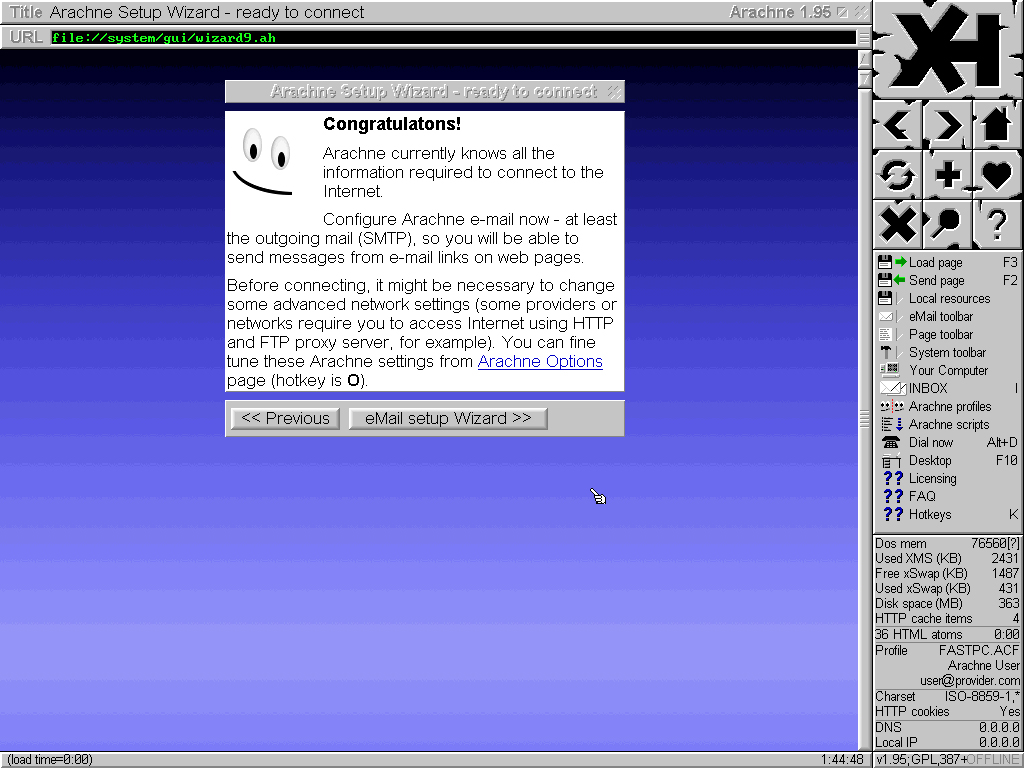
Setting up Arachne web browser for dial-up internet connection is done. Configuring of Arachne built-in e-mail client begins. Click "eMail setup Wizard"
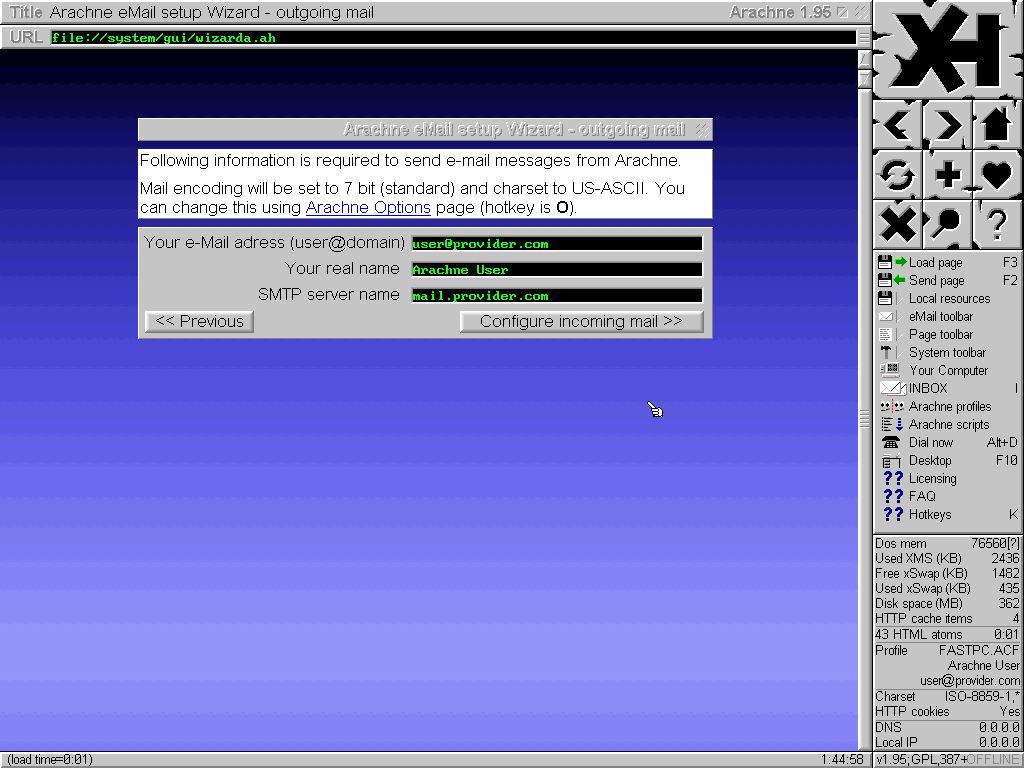
Enter e-mail address, name and SMTP server name. Click "Configure incoming mail"
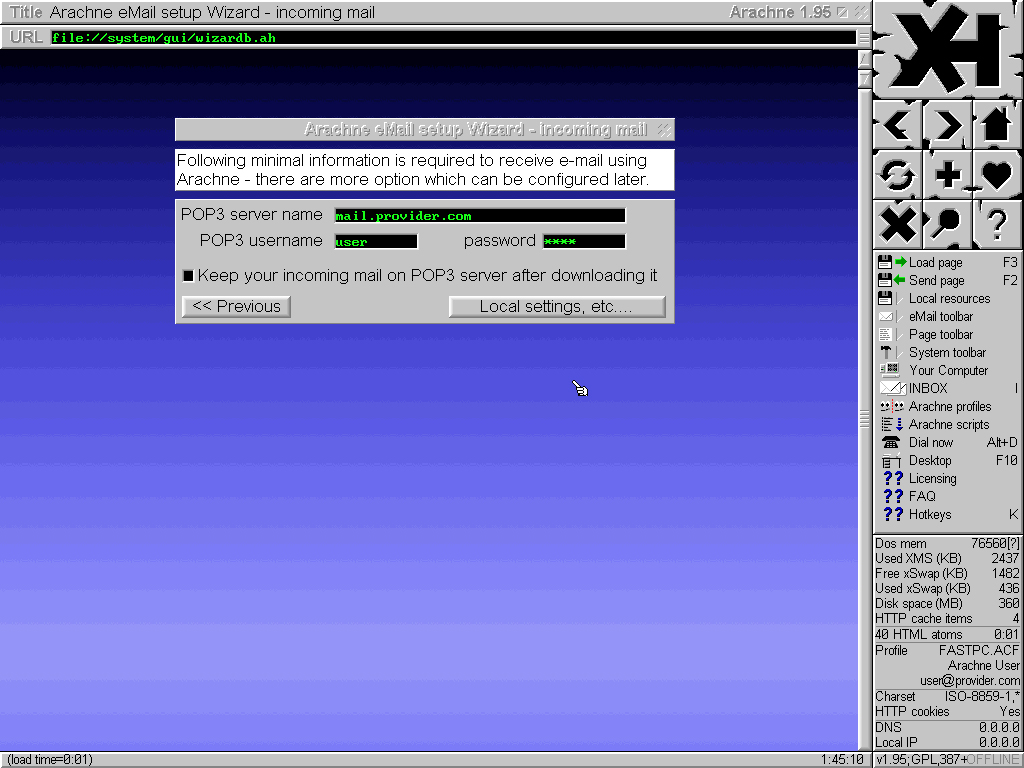
Enter POP3 server name, username, password. And select "Keep your incoming mail on POP3 server after downloading it". Due to Arachne requiring password to be typed in during setup process and kept unencrypted in configuration file, perhaps Arachne e-mail client should not be used for accessing user's main e-mail box. After filling up all the dialogue boxes click "Local settings, etc..."
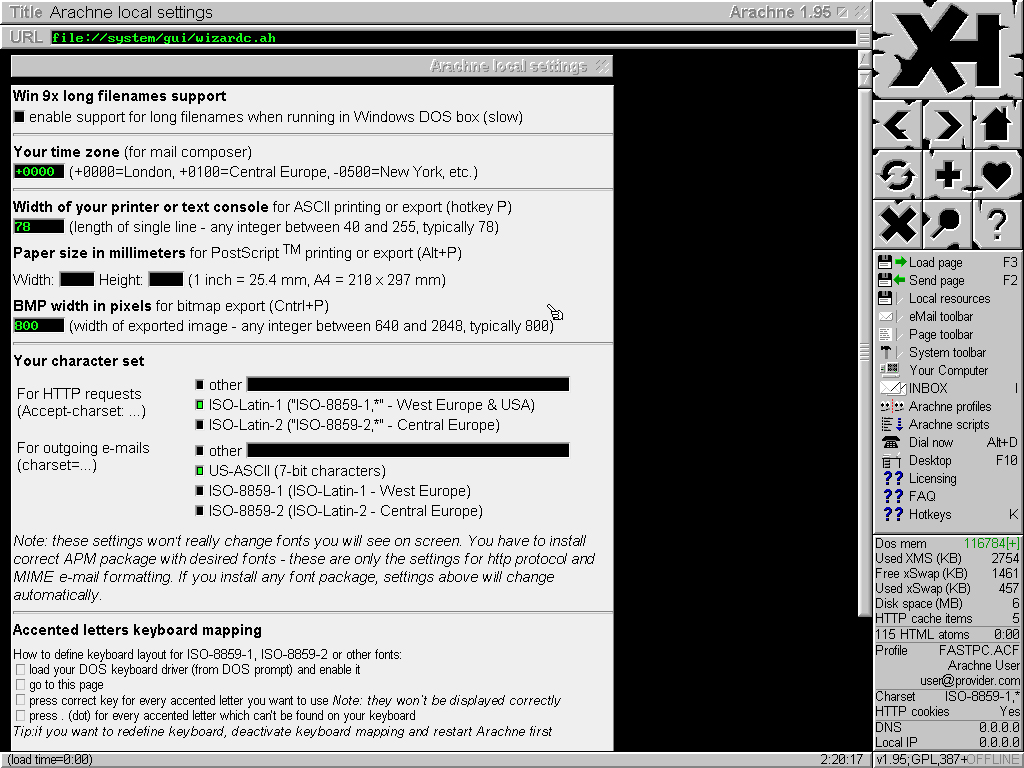
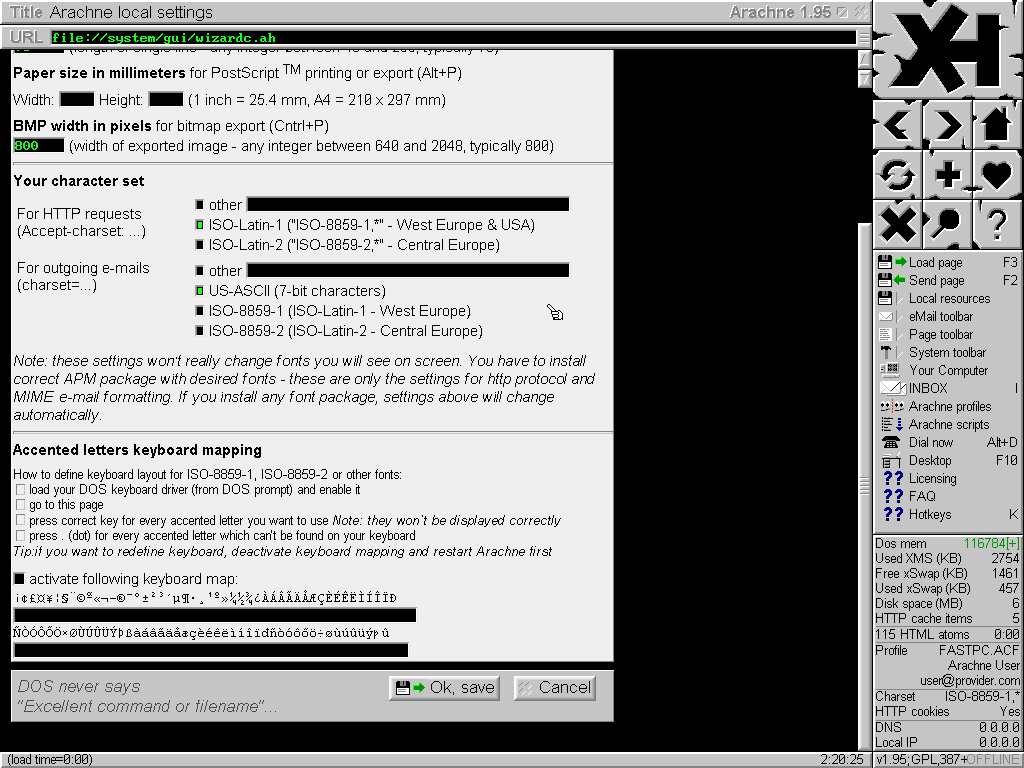
Time zone, character encoding, etc. Just time zone settings and nothing else may be changed here this time. Then click "Ok, save"
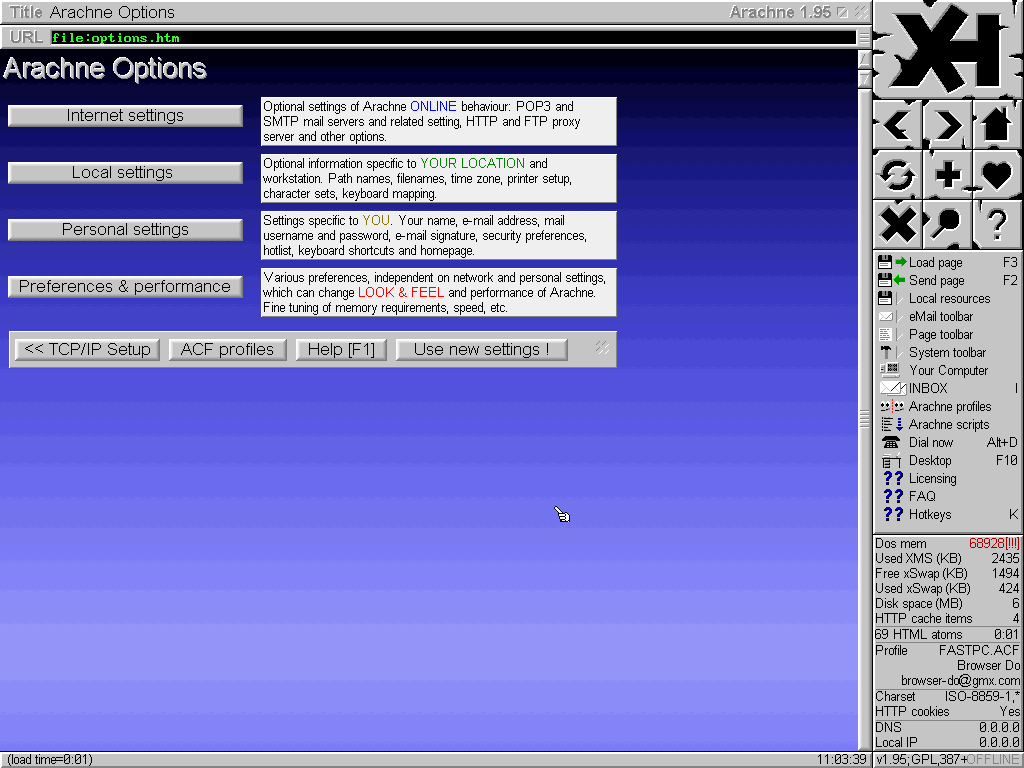
The main part of Arachne web browser settings is done. Now some other characteristics of the browser can be tuned. For that, click "Preferences & performance"
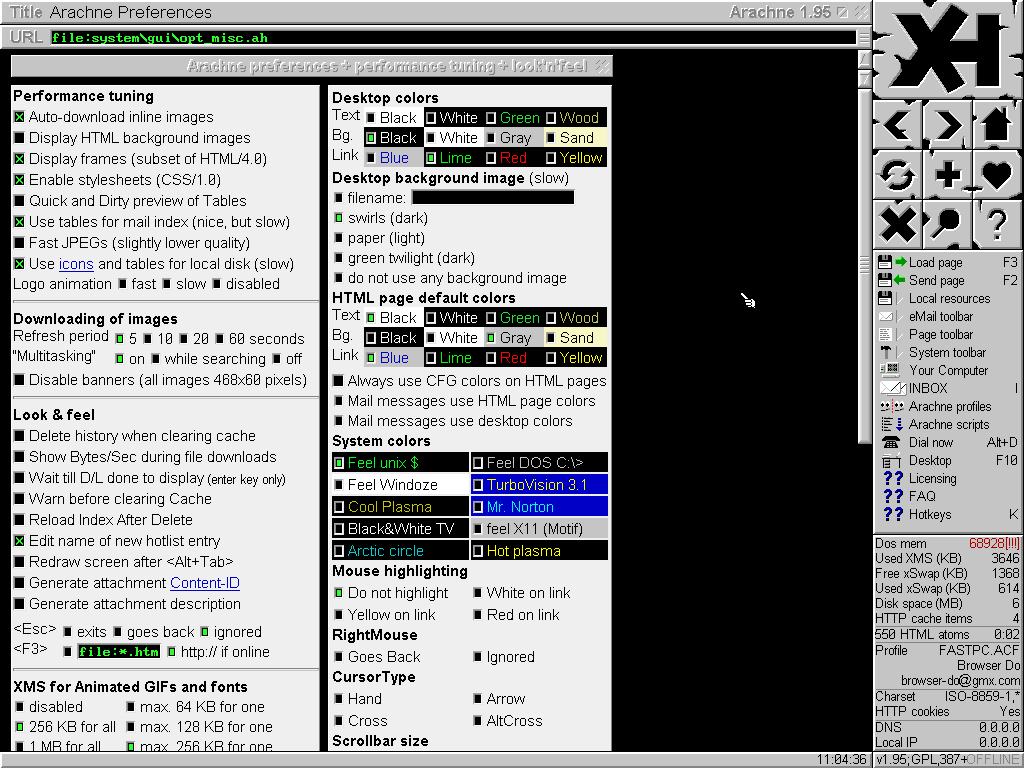
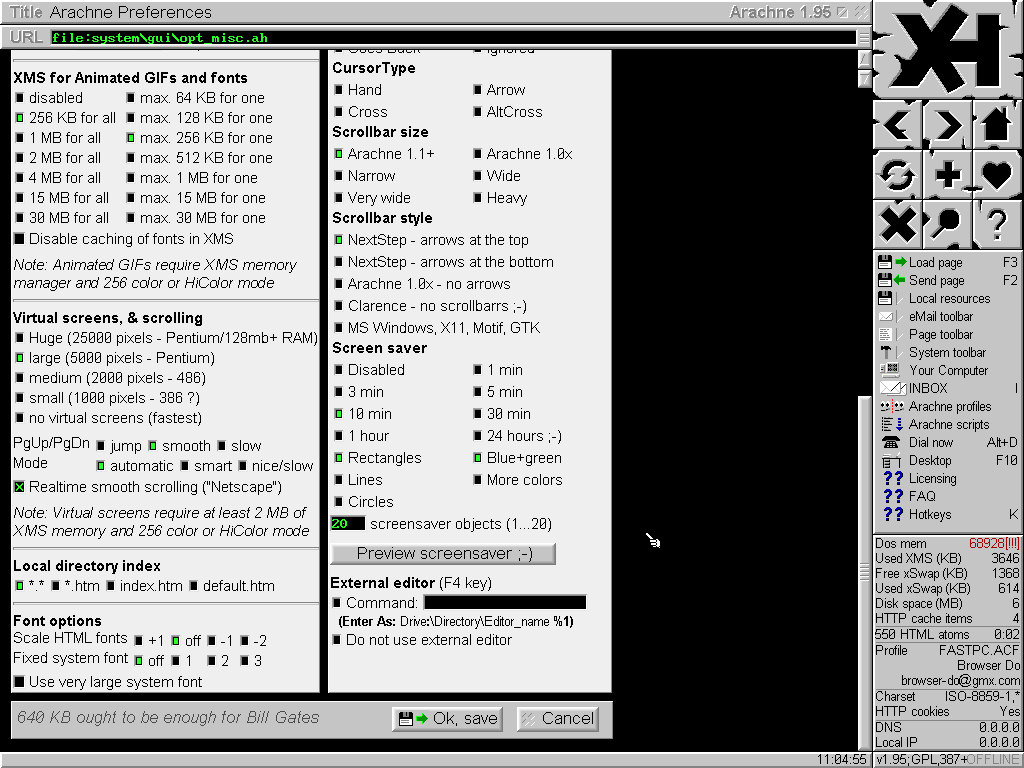
Settings affecting the performance and appearance of Arachne web browser. For maximum speed while maintaining an acceptable quality, choose "no virtual screens (fastest)" and deselect "Realtime smooth scrolling ("Netscape")". Then click "Ok, save"
In order to have the settings selected during the previous steps become effective, click "Use new settings !" The primary phase of installing and setting up Arachne web browser will be finished after that

6. If Arachne web browser is to be used for surfing web pages with character encoding other than Latin for West European languages, put a character set package downloaded from www.glennmcc.org/apm/ into C:\ARACHNE\DOWNLOAD.
7. Start Arachne:
E:\ARACHNE\A
8. If Arachne web browser is to be used for surfing web pages with character encoding other than Latin for West European languages, press U on keyboard, then click "Install Arachne Package" icon in the main area of the browser, then click the icon of the "download" directory, then click the icon of the package with the character set downloaded from www.glennmcc.org/apm/
9. Create ARACHNE folder with DOWNLOAD folder inside on disk C: Since Arachne web browser will be installed on RAM disk, which will be deleted and re-created after each computer restart, all the files of Arachne web browser on RAM disk are going to be disappearing. And that is not convenient in regard to some of them. These files can be transferred to disk C: They may be any files and folders of Arachne web browser or may be none. Here the DOWNLOAD is chosen. It is the folder Arachne web browser places downloaded files in.
10. Edit arachne.cfg, specify the path to the DOWNLOAD folder: DownloadPath C:\ARACHNE\DOWNLOAD\ and the path to cookies.lst: C:\ARACHNE\COOKIES.LST
11. Edit A.BAT to have it as follows:
@echo off
COPY C:\DOS\COMMAND.COM E:
SET COMSPEC=E:\COMMAND.COM
E:
CD E:\ARACHNE
ARACHNE.BAT %1 %2 %3 %4
C:
SET COMSPEC=C:\DOS\COMMAND.COM
12. Make an archive of all the E:\ARACHNE folder contents. For example, A.ZIP archive on disk C:
C:\PKZIP -PR C:\A.ZIP E:\ARACHNE\*.*
13. Edit AUTOEXEC.BAT system file. Somewhere in the middle of it, add:
MKDIR E:\TEMP
SET TEMP=E:\TEMP
SET ARACHNETEMP=E:\TEMP
MKDIR E:\ARACHNE
PKUNZIP -D C:\A.ZIP E:\ARACHNE
14. Restart computer. Arachne web browser is installed and configured for dial-up internet connection. Press Alt+D to connect to internet. Press Esc to cancel dialing. Alt+H to hang up. Each time system restarting, the configured web browser is placed on E: RAM disk and runs from it. Only cookies are put on hard disk and downloaded files are offered to.
If Arachne web browser settings have been changed, check if there have has something saved to E:\ARACHNE\DOWNLOAD\ folder or any other folder inside E:\ARACHNE\ folder. If there has been any - delete everything. Next, having Arachne web browser running, press F8 (clear cache), then close Arachne and repeat actions of item number 12.
Option 2 - Installing on hard disk
Installing and setting up Arachne web browser on hard disk - if RAM size is not sufficient for creating RAM disk of 6 MB and more.
In order to do that, the same list of programs as in case of installing Arachne web browser on RAM disk is required.
Setup and installation
1. Create a RAM disk. Which drive letter will be assigned to it comes from the assumption that A: and B: go to floppy drives (even if there is only one, both letters will be reserved anyway), C: goes to the first active primary MS-DOS partition on the first physical hard disk. If there are more disks, then there will be as many letters used consecutively as to name them all. Unless there are no devices installed using DRIVER.SYS or similar drivers, the next drive letter will be assigned to the RAM disk. In order to be sure, after having the relevant string for making RAM disk added to CONFIG.SYS (See below), computer could be restarted and what letter is assigned to the RAM disk checked by experiment. In this case, it is E:
Reserve 384 KB or more for RAM disk. In the case discussed it is 512 KB. Unlike when the whole Arachne web browser is installed on RAM disk, here only a folder for temporary files and COMMAND.COM will be placed on it.
In order to create such a disk, the string has to be added somewhere in the middle of CONFIG.SYS as follows:
DEVICE=C:\DOS\RAMDRIVE.SYS 512 512 512 /E
Items 2-4 here are identical to items 2-4 of the case when the whole Arachne web browser is installed on RAM disk.
5. Start installation of Arachne web browser on RAM disk. In the case discussed it is C:
A195GPL.EXE
[ Further on the installation process is the same as in case when the whole Arachne web browser is installed on RAM disk. Only in the very beginning specify the path to the folder located on hard disk (in the case discussed it is C:). Or just accept the suggestion by the Arachne web browser installation program - c:\arachne ]
6. If Arachne web browser is to be used for surfing web pages with character encoding other than Latin for West European languages, put a character set package downloaded from www.glennmcc.org/apm/ into C:\ARACHNE\DOWNLOAD.
7. Start Arachne:
C:\ARACHNE\A
8. If Arachne web browser is to be used for surfing web pages with character encoding other than Latin for West European languages, press U on keyboard, then click "Install Arachne Package" icon in the main area of the browser, then click the icon of the "download" directory, then click the icon of the package with the character set downloaded from www.glennmcc.org/apm/
9. Edit A.BAT to have it as follows:
@echo off
COPY C:\DOS\COMMAND.COM E:
SET COMSPEC=E:\COMMAND.COM
CD C:\ARACHNE
ARACHNE.BAT %1 %2 %3 %4
C:
SET COMSPEC=C:\DOS\COMMAND.COM
10. Edit AUTOEXEC.BAT system file. Somewhere in the middle of it, add:
MKDIR E:\TEMP
SET TEMP=E:\TEMP
SET ARACHNETEMP=E:\TEMP
11. Restart computer. Arachne web browser is installed and configured for dial-up internet connection. Press Alt+D to connect to internet. Press Esc to cancel dialing. Alt+H to hang up.
Operating systems
- MS-DOS 6.0+
- FreeDOS 1.0+